

Key Takeaways
- Use saved photos to identify the ideas you like, rather than trying to duplicate an entire backyard.
- Start with how your household will use the pool area during a typical Tampa week.
- Measure the site, review access, and account for drainage, setbacks, trees, and equipment space early.
- Choose must-have features before spending time on decorative extras.
- Plan the pool, deck, shade, lighting, landscaping, and seating as one connected outdoor space.
- Compare proposals by the complete scope of work, not the lowest headline number.
Beautiful pool photos can make a project feel easy. In reality, the most useful images are starting points for a plan that fits your property, routines, and priorities. Reviewing a gallery of pool designs can help Tampa homeowners notice the shapes, materials, and outdoor living features that consistently appeal to them.
A backyard in Tampa, Florida, must work through bright sun, frequent rain, warm evenings, and year-round outdoor use. A photo may show a stunning pool finish or lounge ledge, but it cannot reveal the lot dimensions, drainage conditions, privacy concerns, construction access, or maintenance needs behind the finished space. The goal is not to copy one image exactly. It is to recognize the elements that will make your own backyard more enjoyable.
Why Inspiration Photos Need a Real Plan
Camera angles can make compact yards appear larger, while mature landscaping can hide fences, utility equipment, and neighboring homes. Water color also changes with sunlight, interior finish, depth, and surrounding surfaces. Before choosing a tile pattern or water feature, establish what can realistically fit and how people will move through the yard.
For Tampa-area properties in Hillsborough County, permit submittals commonly require a scaled site plan that identifies property boundaries, setbacks, existing structures, easements, and the proposed work. Reviewing residential pool requirements early can help homeowners prepare better questions for their builder and avoid treating site constraints as a last-minute surprise.
Step One: Sort Photos Into Design Categories
A large folder of unsorted images is hard to use in a design meeting. Create separate collections and save notes about what you like in each photo.
Photorealistic macro close-up of a homeowner’s hand sorting small pool design photo prints beside textured tile, coping, and decking samples on a sunlit planning table, shallow depth of field, soft background blur, detailed material textures.
- Pool shape: Rectangular, freeform, narrow, compact, or lap-oriented.
- Water features: Entry steps, tanning ledges, benches, spas, bubblers, scuppers, or swim lanes.
- Materials: Decking, coping, tile, interior finish, and feature walls.
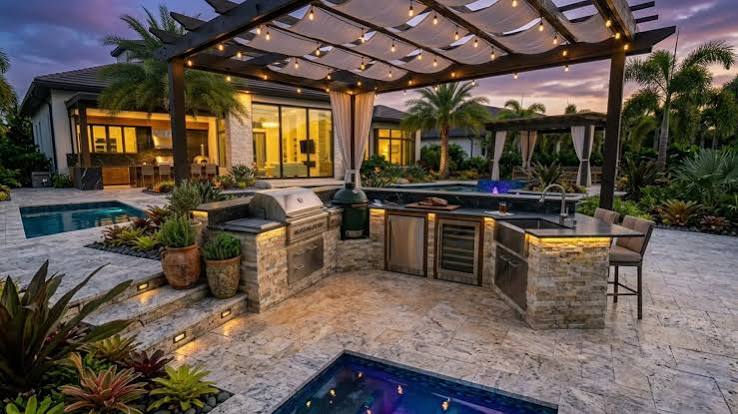
- Outdoor living: Dining zones, lounge seating, kitchens, fire features, and covered areas.
- Lighting and landscape: Underwater lighting, pathways, privacy planting, and nighttime ambiance.
Step Two: Decide How the Backyard Will Be Used
Function should lead the design. Ask whether the space is mainly for family play, quiet relaxation, entertaining, exercise, or a mix of all four. Consider how many people may regularly use the yard, where towels and pool toys will go, and whether pets, young children, or older guests need special consideration.
A family-focused layout may prioritize shallow water, broad steps, open sightlines, and generous deck space. A homeowner who swims for fitness may prefer a longer, uninterrupted water area with fewer features competing for space. Neither approach is better. The right choice is the one that supports daily use.
Step Three: Measure Before Choosing Features
- Measure the usable backyard area, not just the entire lot.
- Mark doors, windows, patios, fences, trees, and utility equipment.
- Identify slopes, drainage paths, easements, and limited access points.
- Note where the shade falls during the times your family expects to use the space.
- Reserve room for circulation, equipment service, and future improvements.
A slightly smaller pool with comfortable walkways, seating, and shade can feel more luxurious than the largest possible shell surrounded by narrow leftover strips of deck.
Step Four: Choose One Clear Design Direction
Scattered inspiration becomes more cohesive when you select a simple design identity. Write down two or three words that describe the desired mood, such as calm, bright, private, social, natural, or low-maintenance.
- Modern: Straight lines, restrained colors, clean edges, and simple materials.
- Natural: Curves, layered planting, varied textures, and softer transitions.
- Resort-inspired: Lounge zones, water movement, warm finishes, and evening lighting.
- Family-friendly: Durable surfaces, flexible seating, visible water, and practical storage.
Step Five: Separate Must-Haves From Nice-to-Haves
Must-Haves
Must-haves support the pool’s main purpose, safe access, or everyday comfort. They may include broad entry steps, a shallow ledge, enough swimming length, shade, or privacy screening.
Nice-to-Haves
Nice-to-haves add visual interest but may not be essential. Multiple water effects, specialty tile, decorative walls, and expanded lighting can be excellent additions when they fit the budget and do not compromise the core layout. A focused design often feels more polished than a yard filled with unrelated features.
Step Six: Build a Practical Materials Palette
Select one primary deck material, then choose coping and tile that either coordinate or create intentional contrast. Review samples outside in direct sun and again near dusk. In Tampa’s warm weather, surface temperature, wet traction, texture, cleaning needs, and long-term appearance deserve as much attention as color.
A small materials board can keep decisions organized. Include photos, physical samples when available, estimated costs, and notes about maintenance. This makes it easier to see when too many patterns or competing tones are entering the plan.
Plan the Whole Backyard, Including Safety and Maintenance
Think beyond the waterline. Place chairs where guests can talk without blocking walking paths, leave useful space for dining or grilling, and plan storage for floats, towels, cleaning tools, and games. Consider views from inside the house, privacy from adjacent homes, and how the space will function after dark.
Safety should be integrated from the start, not treated as an accessory. Florida health officials describe supervision, barriers, alarms, and emergency preparedness as complementary layers of protection around water. A layered water-safety approach supports decisions about gates, lighting, barriers, covers, and clear pool access.
Create a Budget Framework and Compare Proposals
Your budget should account for excavation, pool construction, decking, coping, tile, equipment, electrical work, drainage, grading, landscaping, permits, inspections, furniture, and shade. Set a target range, then retain a reserve for site conditions or approved changes.
When comparing proposals, check the full scope instead of comparing totals alone:
- Pool dimensions, depth, shape, and construction method.
- Included finishes, decking, coping, tile, and lighting.
- Equipment brands, models, controls, heating, and sanitation.
- Drainage, grading, permitting, engineering, cleanup, and landscaping allowances.
- Payment schedule, change-order process, and delay resolution.
A Simple Photo-to-Plan Worksheet
- Three words for the desired style: ____________________
- Main purpose of the pool: ____________________
- Top three must-have features: ____________________
- Features to avoid: ____________________
- Preferred colors and materials: ____________________
- Expected number of regular users: ____________________
- Preferred maintenance level: Low, moderate, or high
- Target budget range: ____________________
Conclusion
Inspiration photos are most valuable when they begin a thoughtful conversation. For a Tampa backyard, the strongest plan combines personal taste with accurate measurements, practical circulation, site-aware choices, a realistic budget, and features that support everyday life. Save the images that spark ideas, then turn those ideas into a backyard that works beautifully long after construction is complete.