


Key Takeaways
- Clean the boat thoroughly and remove personal items before taking photos.
- Organize service records, ownership documents, and included equipment details early.
- Disclose known issues instead of allowing them to become surprises during an inspection.
- Price the boat using comparable listings, condition, engine setup, and equipment.
- Prepare for buyer questions, an independent inspection, and a secure paperwork process.
Preparing a used boat for sale is less about making it look brand new and more about making its condition easy for a buyer to understand. Whether you plan to list privately, trade it, or sell a boat through a dealership, a clean presentation, accurate details, and organized paperwork can make the process more straightforward.
Buyers often notice small details quickly. A cluttered cockpit, a dead navigation light, a missing service receipt, or an unanswered question about engine hours can create doubt. Addressing what you can and documenting what you cannot helps set realistic expectations before a viewing, inspection, or sea trial.
Why Preparation Matters Before a Boat Sale
A prepared boat is easier to evaluate. Buyers can open lockers, inspect the engine area, review records, and see what equipment is included without guessing. Preparation does not require hiding age or spending heavily on cosmetic upgrades. It means presenting the boat honestly and making its condition accessible.
For example, an older fishing boat with clean seats, labeled records, a tidy bilge, and a complete equipment list may inspire more confidence than a newer boat with cluttered storage compartments and no maintenance details. Sellers comparing private-sale and trade options can also speak with boat dealers in Missouri to understand the information typically needed to evaluate a boat.
Step 1: Set a Clear Selling Plan
Choose your preferred route before setting a price. A private sale may allow more control over the asking price, while a trade or dealer-assisted sale may simplify parts of the process. Set a target timeline, account for storage and loan payoff needs, and write down your minimum acceptable price. Also list what stays with the boat, including the trailer, covers, electronics, anchors, and safety equipment.
Step 2: Inspect the Boat From Bow to Stern
Walk through the boat as a careful buyer would. Check the hull, rub rail, transom, deck, hatches, hardware, and upholstery for visible damage, soft spots, corrosion, leaks, stains, mildew, or loose fittings. Test lights, pumps, gauges, switches, electronics, and other installed systems. In the engine compartment, look for fluid leaks, damaged belts, loose connections, or heavy corrosion. If a trailer is included, inspect its tires, lights, winch, safety chains, wheels, and coupler. Write down each known issue.
Step 3: Clean and Stage the Boat
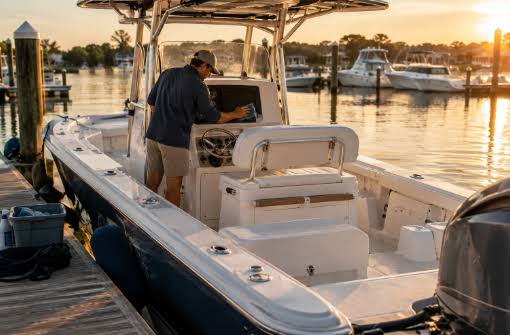
Wash the exterior, wipe down seating, clean storage compartments, and remove trash, personal belongings, old fishing gear, and unused supplies. Clean the cabin and bilge if applicable. Open hatches and lockers during showings so buyers can see the available space. Small repairs, such as replacing a broken latch or nonworking light, may be worthwhile. Avoid expensive upgrades unless they solve a clear problem or are likely to matter to your intended buyer.
Step 4: Gather the Right Records
Service invoices and dated maintenance logs support your description of the boat better than general statements about care. Collect the title or other ownership evidence, current registration, engine-hour information, repair receipts, manuals, warranty documents, and any lien payoff or release paperwork. Federal documentation and state registration are separate matters in some cases, so review the applicable U.S. Coast Guard vessel documentation guidance along with your state’s transfer requirements.
Step 5: Create a Complete Equipment List
Use plain language to describe the boat’s engine make, horsepower, number of engines, approximate hours, electronics, trolling motor, generator, anchors, covers, trailer, and safety gear. Include model numbers when they help identify an important item. Separate what is included from items you plan to keep. Specific lists are more useful than phrases such as “fully loaded” or “too many extras to list.”
Step 6: Take Better Photos and Video
Take current photos after cleaning the boat, preferably in even daylight. Capture both sides, the bow, stern, cockpit, helm, cabin, engine area, storage spaces, and trailer. Show normal wear and known damage clearly. A short walk-through video can help buyers understand the layout, storage access, and general condition before arranging a visit.
Step 7: Price the Boat With Evidence
Compare similar boats by year, type, length, engine setup, condition, location, and included equipment. Consider major repairs, cosmetic wear, trailer condition, service history, and useful upgrades when setting the asking price. Leave reasonable room for negotiation, but avoid starting so high that interested buyers pass over the listing before contacting you.
Step 8: Write an Honest Listing
Start with the year, make, model, size, engine details, approximate hours, and location. Then describe the boat’s strongest features, recent service work, included equipment, and known needs. Avoid unprovable claims such as “perfect” or “needs nothing.” A clear listing should tell buyers what they are seeing, what they are getting, and how to request a viewing.
Step 9: Prepare for Buyer Questions
Expect questions about storage, use, engine hours, service history, accidents, repairs, reason for selling, and title status. Keep your equipment list and records nearby for calls or appointments. If you do not know an answer, say so rather than guessing. Direct answers can save time for both parties.
Step 10: Plan for an Inspection and Sea Trial
A serious buyer may request a marine survey, a mechanical inspection, a haul-out, or a sea trial. Make the boat accessible, keep keys and manuals available, and ensure the batteries, fuel, and essential systems are ready for agreed testing. Discuss who will operate the boat, who pays for inspection-related costs, and how repair requests will be handled before the appointment.
Step 11: Organize the Closing Paperwork
Confirm that the hull identification number matches the ownership documents. Review the title, registration, bill of sale, lien status, and state-specific transfer rules before completing the transaction. For federally documented vessels, use the National Vessel Documentation Center instructions and forms to identify the appropriate transfer materials. Keep signed copies of the agreement, payment record, transfer documents, and delivery receipt.
Common Mistakes That Slow Down a Sale
- Using blurry, dark, or outdated photos.
- Leaving out engine hours, trailer details, or important equipment.
- Hiding known damage until an inspection.
- Setting the price based only on personal attachment.
- Listing the boat before checking for missing documents or liens.
Final Checklist Before the Boat Goes on the Market
- Cleaned boat and removed personal items.
- Recorded known problems and completed minor practical repairs.
- Organized records, ownership documents, and lien information.
- Completed equipment list, current photos, and video.
- Reviewed comparable boats and set a realistic asking price.
- Prepared for viewings, inspections, sea trials, and closing paperwork.
Conclusion
A successful used-boat sale starts with clarity. When the boat is clean, the records are organized, the photos are up to date, and known issues are disclosed, buyers have fewer unanswered questions. That preparation can reduce delays and help create a smoother path from the first inquiry through final delivery.