


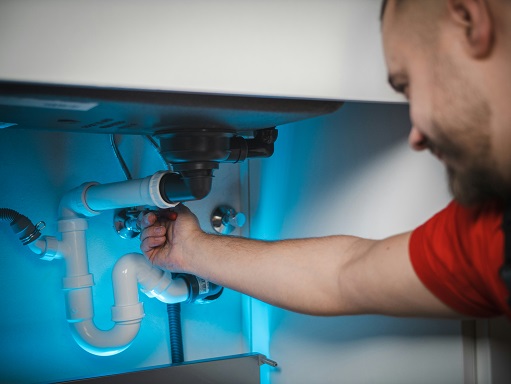
Introduction to Home Repairs
For homeowners, possessing basic home repair skills is not merely advantageous; it is essential. Many people find themselves facing various tasks around the house that require immediate attention, and having the knowledge to tackle these issues can lead to significant benefits. Understanding simple home repairs can greatly enhance a homeowner’s ability to maintain their property efficiently. One of the most significant advantages of knowing how to perform basic repairs is the potential for financial savings. Homeowners can avoid costly repair bills by addressing minor issues proactively rather than waiting for them to escalate into major problems. For example, fixing a small leak in plumbing can prevent widespread water damage, leading to costly restoration. Knowledge of home repairs can thus serve as a valuable asset, allowing property owners to allocate their financial resources more effectively.
Additionally, mastering basic repair skills contributes to increasing a home’s overall value. Potential buyers often look for properties that are well-maintained, and demonstrating the ability to handle routine repairs can make a significant difference in real estate transactions. A homeowner who takes pride in their ability to address repairs promptly is likely to see a return on investment when it comes time to sell their property.
Furthermore, engaging in home repair tasks can cultivate a sense of confidence and satisfaction among homeowners. Successfully fixing something around the house fosters a feeling of independence and enhances one’s relationship with their living space. This confidence often results in increased motivation to take on larger home improvement projects, further enhancing the overall quality and enjoyment of the home.
Essential Tools for Home Repairs
Homeownership comes with its fair share of responsibilities, and one vital aspect is the ability to perform basic home repairs. Equipped with the right tools, homeowners can address a myriad of situations effectively and efficiently. Various types of tools are essential for tackling common repairs and maintenance tasks, allowing individuals to handle problems that may arise in their homes.
First and foremost, a comprehensive toolset should include a hammer. This fundamental tool is used not only for driving nails into wood but also for removing them when necessary. A claw hammer is particularly versatile, making it a staple in any repair arsenal. Furthermore, a set of screwdrivers—including both flathead and Phillips—are indispensable for assembling furniture, tightening screws, or performing minor fixes around the house.
Equally important is a reliable tape measure. Whether you are hanging shelves or framing walls, accurate measurements are critical to achieving a professional look. Having a high-quality level is also crucial, as it ensures that your projects are even and straight. For any home repair, a utility knife provides the functionality needed for cutting various materials, from cardboard to plastic.
In addition to these tools, a plunger and a wrench are vital for plumbing-related issues. A plumber’s wrench can aid in tightening or loosening various plumbing fittings, which can save homeowners both time and money on repairs. Lastly, safety gear such as gloves and goggles should not be overlooked; they protect against potential injuries while working on various home tasks.
In essence, possessing these essential tools equips homeowners with the necessary means to address a wide array of repair tasks confidently. Proper tool usage not only enhances safety but also guarantees quality results in home maintenance, making it a worthwhile investment for every homeowner.
Fixing Leaky Faucets
Leaky faucets are a common issue that many homeowners encounter, and addressing this problem promptly can save both water and expenses. It is essential first to identify the source of the leak, which is often found in the faucet’s components, such as washers, O-rings, or seals, which may wear out over time.
The tools needed for the repair process typically include a screwdriver, an adjustable wrench, a replacement washer or O-ring, plumber’s tape, and a small bucket. When gathering your tools, it’s beneficial to consult the faucet’s manufacturer instructions, as specific models may require additional tools or components.
To start, turn off the water supply to the faucet. This is usually done by locating the shut-off valves under the sink. Next, open the faucet to relieve any remaining pressure and water. With the supply turned off, use a screwdriver to remove the handle. Depending on your faucet type, you may need to remove a decorative cap to access the screw. Once the handle is detached, you can then progress to remove the packing nut using your adjustable wrench.
After removing the packing nut, pull out the stem or cartridge and inspect it for any signs of wear or damage. If the washer or O-ring appears frayed or worn, replacing these components can often resolve the leak. Install the new washer or O-ring by carefully fitting it onto the stem or cartridge and reassemble the faucet in reverse order. Ensure all connections are snug but not overly tight to avoid damaging any components.
Once everything is back in place, turn the water supply back on and check for leaks. If everything is properly sealed, the faucet should operate without any dripping. Knowing how to fix a leaky faucet not only enhances your home’s functionality but also aids in conserving water resources.
Patch Up Holes in Drywall
Repairing small holes and cracks in drywall is a valuable skill for homeowners, ensuring that your interior walls maintain a polished and uniform look. The process begins with proper preparation of the area that requires repair. First, it is essential to clean the surrounding surface of the hole or crack, removing any loose debris or flaking paint to create an optimal bonding surface. A utility knife can be used to square the edges of the hole, which will help the patch adhere better.
Next, choose a suitable patching compound for the repair. For small holes, a simple spackling compound works well, whereas larger holes may require a patch made of mesh or drywall cut to fit. If using a patch, apply a thin coat of compound around the edges of the hole before placing the patch over it. Ensure that the patch fits snugly against the wall to avoid any gaps.
After placing the patch, use a putty knife to apply a layer of the patching compound over the entire area. Be sure to feather the edges of the compound, blending it into the surrounding wall to create a smooth transition. Allow sufficient time for the compound to dry, which is typically several hours, depending on the manufacturer’s instructions. Once dry, lightly sand the area with fine-grit sandpaper until it is flush with the surrounding wall.
Finally, wipe the area clean to remove any dust before priming and painting. This final step ensures the repair blends seamlessly with the rest of the drywall. In summary, knowing how to patch holes in drywall is an essential skill for any homeowner, enhancing the aesthetic value of your home and ensuring it remains in good condition.
Unclogging Drains and Toilets
Clogged drains and toilets are common issues faced by homeowners, often leading to frustration and potential damage if not addressed promptly. Understanding how to effectively unclog these fixtures can save time, money, and prevent further complications. To start, preventive measures are essential in avoiding clogs. Dispose of grease, food scraps, and hair carefully, using strainers to catch debris that would otherwise travel down the drain. Establishing these habits can significantly reduce the likelihood of blockages.
When a clog does occur, homeowners should equip themselves with essential tools such as a plunger, drain snake, or auger. A plunger is particularly effective for toilets and sinks, utilizing pressure to dislodge the obstruction. It is imperative to select the appropriate plunger: a flange plunger works best for toilets while a cup plunger is suitable for sinks and showers. To use a plunger, ensure there is enough water in the bowl or sink to cover the rubber part, and create a tight seal before plunging vigorously.
If plunging fails to clear the blockage, a drain snake can be employed. This tool consists of a thin, flexible metal rod designed to reach further down pipes and dislodge more stubborn obstructions. Insert the snake into the drain until resistance is felt, then twist and rotate to break up the clog. Exercise caution to avoid damaging pipes, especially in older plumbing systems. If both methods prove ineffective, chemical drain cleaners may be used, though they should be approached with caution due to potential damage to pipes and environmental concerns.
Homeowners should also be aware of the importance of routine maintenance. Regularly flushing drains with a mixture of vinegar and baking soda can help to keep them clear, as this natural solution breaks down build-up without harmful chemicals. By familiarizing oneself with these techniques, homeowners can confidently manage clogs while preserving the integrity of their plumbing systems.
Changing a Light Fixture
Changing a light fixture is a common task that many homeowners should be equipped to handle. This process not only allows for personalization of the home’s aesthetic but also provides an opportunity to upgrade to more energy-efficient lighting. However, safety must always be a priority. Before beginning, switch off the power supply to the electrical circuit where the fixture will be changed. This can be accomplished by turning off the corresponding circuit breaker and verifying there is no power with a voltage tester.
Once safety precautions are taken, gather the necessary tools to simplify the process. Essential tools include a screwdriver, pliers, wire cutters, and a ladder if the fixture is positioned high. It may also be helpful to have electrical tape and wire connectors on hand. When you have the right tools, you can proceed to remove the old fixture.
Start by carefully detaching the existing light fixture. After removing the screws that secure the fixture to the ceiling, gently pull it down. Make note of how the wires are connected; typically, there will be one or two black (live) wires, white (neutral) wires, and sometimes a green or bare (ground) wire. Use the pliers to disconnect these wires, ensuring they are fully separated from the old fixture. It is advisable to take a picture of the original installation, as this can serve as a helpful reference during the reinstallation.
To install the new light fixture, begin by connecting the wires, matching them according to their respective colors. Secure them using wire connectors, and then carefully tuck the wires back into the electrical box. Attach the new fixture to the ceiling, ensuring it is firmly fastened. After double-checking all connections, restore power to the circuit and test the new light fixture. Following these steps ensures a safe and effective installation, enhancing the functionality and appearance of your home.
Sealing Drafty Windows and Doors
One prevalent issue in many households is the presence of drafts in windows and doors, which can significantly affect energy efficiency. A drafty window or door not only leads to discomfort but also increases heating or cooling costs. Identifying these drafts is the first crucial step in addressing the problem. Homeowners can perform a simple test by running their hands around the edges of windows and doors to feel for cold air. Alternatively, on a breezy day, use a lit incense stick; the smoke will waver if air is leaking through.
Once drafts are identified, there are several effective sealing products available on the market. Weatherstripping is one common solution, consisting of various materials such as foam, vinyl, or metal, and can be used on movable components of doors and windows. Caulking is another option, useful for filling gaps and cracks that are stationary. Homeowners should choose urethane or silicone caulk for their flexibility and durability, ensuring long-lasting effects. Additionally, door sweeps or thresholds can be installed at the bottom of doors to block drafts from the floor.
Installing these sealing products is generally straightforward. For weatherstripping, measure the length of the window or door frame, cut the material to size, and press it firmly into place according to the manufacturer’s instructions. When using caulk, ensure the surface is clean and dry, then apply it evenly in the gaps with a caulking gun. A putty knife can help smooth the caulk for a uniform finish. Regular checks and maintenance after installation are recommended to ensure the longevity of the seals.
Properly sealing windows and doors offers numerous benefits. It enhances energy efficiency by preventing heat loss during winter and keeping cool air inside during summer, translates into lower utility bills, and promotes a more comfortable living environment. Moreover, reducing drafts can help in minimizing strain on HVAC systems, contributing to their longevity. Thus, addressing drafts in windows and doors is a simple yet impactful repair every homeowner should prioritize.
Basic Gardening Repairs
Gardening is an essential aspect of home maintenance that significantly enhances both the aesthetics and value of a property. Homeowners should be aware of several basic gardening repairs that they can manage effectively to maintain a well-kept yard. One of the most common tasks involves managing overgrown plants.
Overgrown plants can become unruly, obstructing pathways, overshadowing other plants, or even damaging fences. Regular trimming and pruning not only control plant growth but also promote healthier foliage. When tackling overgrown shrubs or hedges, it is advisable to use appropriate tools, such as shears or loppers, and to approach the task gradually. This ensures a neat appearance while supporting the plant’s growth cycle.
Another aspect of garden upkeep involves repairing fences. Fences serve both functional and aesthetic purposes, offering security and adding character to the landscape. Homeowners should regularly inspect their fences for damage, such as broken boards, rusted nails, or weakened posts. Minor repairs can often be completed using basic tools like a hammer, screwdriver, and wood glue. For more severe damage, replacing panels or posts might be necessary to restore the fence’s integrity.
Maintaining plant beds is also crucial for enhancing curb appeal. Regularly weeding, mulching, and edging plant beds can significantly improve a garden’s appearance. Mulching not only suppresses weeds but also helps retain soil moisture, promoting healthier plants. Homeowners should dedicate time to assessing their plant beds each season, refreshing the mulch, and removing any invasive weed species to keep their gardens thriving.
In summary, managing overgrown plants, fixing fences, and maintaining plant beds are fundamental gardening repairs that homeowners can perform. Engaging in these tasks not only uplifts a property’s visual appeal but also ensures a healthier garden environment.
Conclusion: Empowering Homeowners with Repair Skills
In today’s fast-paced world, the ability to perform simple home repairs can significantly empower homeowners. Mastering these essential skills not only instills a sense of confidence but also fosters a deeper understanding of one’s living environment. When homeowners take the initiative to learn repair techniques, they gain the capability to address minor issues before they escalate into bigger, more expensive problems.
Engaging in basic home repairs has considerable financial advantages. By handling small tasks independently—such as patching drywall, unclogging drains, or changing light fixtures—homeowners can save money that would otherwise be spent on hiring professionals. Furthermore, with a little practice and the right resources, many find that these repairs are not as daunting as they appear. Each successful repair can encourage homeowners to tackle more complex projects over time.
Additionally, enhancing repair skills contributes to maintaining and improving the overall condition of a home. Regular maintenance and timely fixes can prolong the life of various systems within the home, from plumbing to electrical components. This proactive approach not only keeps homes in good shape but can also increase their value when it comes time to sell.
Ultimately, acquiring the knowledge and confidence to perform simple repairs leads to a greater sense of ownership and pride in one’s home. Homeowners are encouraged to embrace these tasks, engage in continuous learning, and share their experiences with others. Whether through online tutorials, workshops, or community classes, there are ample resources available to assist in this journey.
By stepping up to these challenges, homeowners not only enhance their properties but also create a more fulfilling living experience for themselves and their families.